
Managing Spaces and Users
The Application Owner section of Administration is where Application Owners manage the whole Smartchat instance: every Space, every user, and the settings that apply to everyone. Open it with Administration → Application Owner.
Spaces
Section titled “Spaces”Spaces lists every Space of the instance with its number of members, its Space Owners and its creation date. A column shows which Spaces hold confidential data, and you can switch confidentiality on or off for a Space directly in that column.
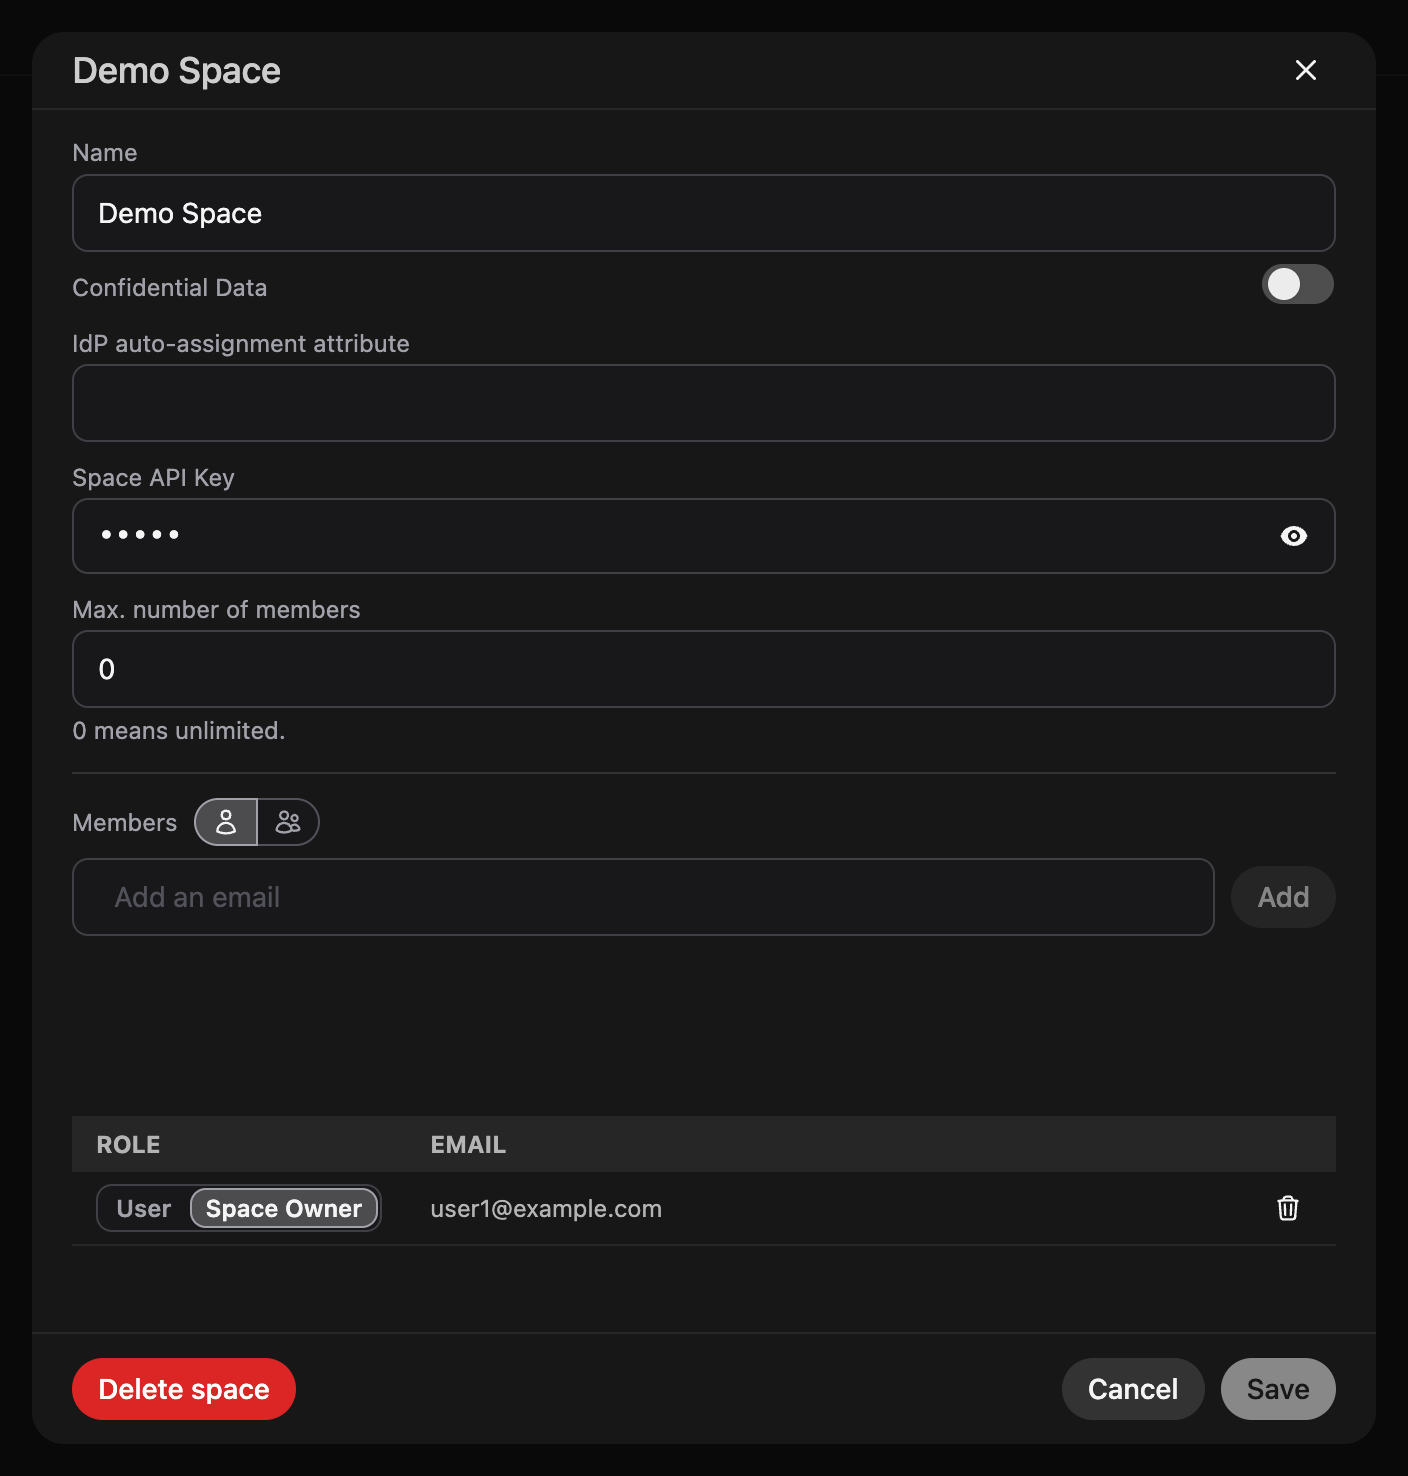
Click a Space to open its configuration:
| Field | Description |
|---|---|
| Name | The Space’s name as members see it in the Space selector. |
| Confidential Data | Treats all data in the Space as confidential. See Confidentiality. |
| IdP auto-assignment attribute | Links the Space to an attribute from your identity provider, for example an Active Directory group. Everyone who signs in with that attribute is added to the Space automatically. |
| Space API Key | The key Smartchat uses to reach model serving for this Space. Once saved, it is only shown masked. |
| Max. number of members | How many members the Space may have. 0 means unlimited. |
| Members | The members and their roles. Add members by email, one at a time or several at once, switch a member between User and Space Owner, or remove them. |
Creating a Space
Section titled “Creating a Space”Click New space above the list to create a Space. The dialog configures it completely in one step; see Setting Up a New Space.
Users lists everyone registered on the instance, including people who have been added but have never signed in, with their creation date and the Spaces they belong to.
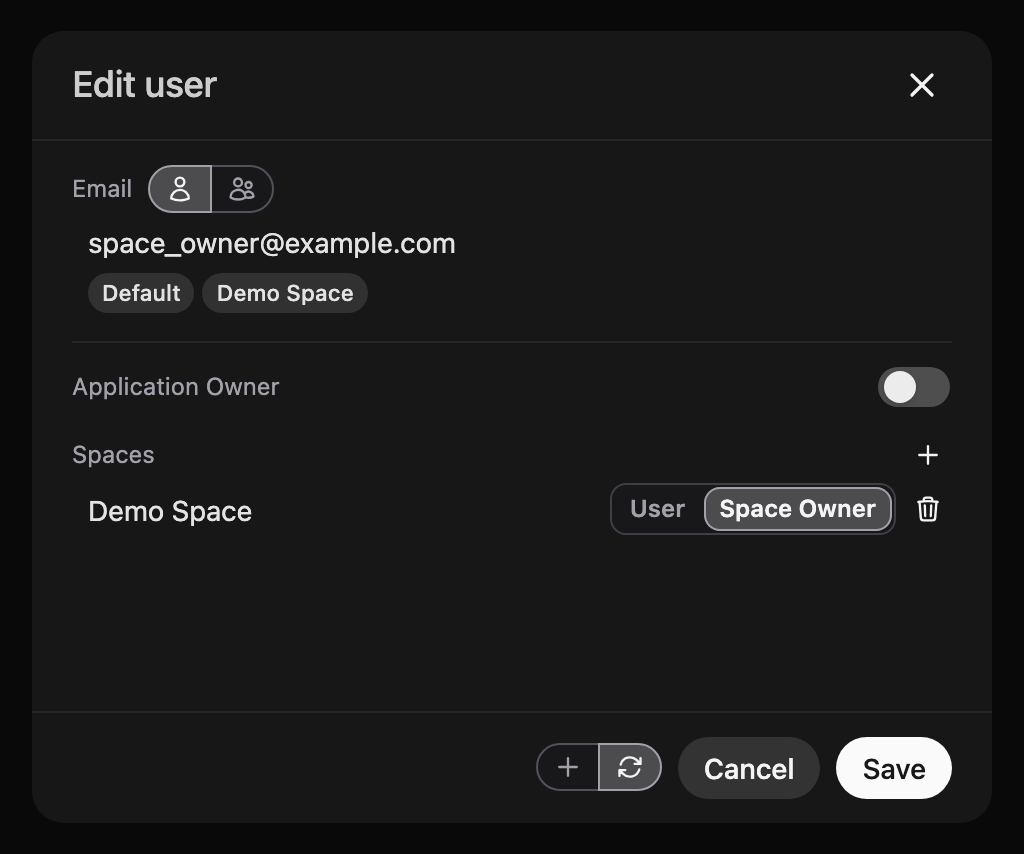
Click a user to open Edit user. It shows every Space the user belongs to and their role in each:
- Add the user to another Space, or take a Space away.
- Switch a role between User and Space Owner.
- Switch Application Owner on or off for the user.
Add users above the list opens the same dialog empty, so you can give Spaces and roles to people who are not listed yet. Addresses without an account are marked Will be created.
Click Save to apply the changes. The dialog shows what will happen before you save: which Spaces will be added, which will be taken away, and whose role changes.
One user or several
Section titled “One user or several”The switch next to Email sets how many people the dialog changes:
- One user: a single email address.
- Several users at once: one email address per row. The clipboard button next to the rows takes a whole list of addresses at once. The Spaces, roles and Application Owner setting below apply to every listed user. The dialog tells you when a list is longer than your instance allows in one go.
Add or replace
Section titled “Add or replace”The switch next to Cancel sets what happens to the Spaces the users already have:
- Add (plus icon): the users keep the Spaces they have and get the ones listed in the dialog as well. Adding never takes anything away, so it does not revoke Application Owner either.
- Replace (arrows icon): the users end up with exactly the Spaces listed in the dialog and lose every other one. Application Owner is revoked when its switch is off.
Edit user starts in Replace, because the dialog already lists all of the user’s Spaces. Add users starts in Add. Replacing for several users at once shows a warning, because each of them loses every Space that is not in the list.
You cannot revoke your own Application Owner role. Ask another Application Owner.
Spaces assigned by your identity provider stay assigned, whatever you change here.
Instance settings
Section titled “Instance settings”Interface and Code Execution hold settings that apply to the whole instance, for example banners and the prompt suggestions shown on the start screen. Changes affect all users.